Guide · Equipment comparison
Best Power Rack Under $500: How to Compare Before You Buy
Equipment education — not medical advice. Respect manufacturer load ratings. Stop training and seek care for sharp pain, dizziness, or unexplained symptoms.
Direct answer
A rack below a budget cap is a dimensions-and-safety decision before it is a brand decision. Verify ceiling clearance, usable inside depth, hole spacing, compatible safeties, anchoring requirements and total delivered cost. “Under $500” describes a reader budget, not a guaranteed live Muslex price.
- Measure first
- Height, depth, width and bar clearance.
- Safety first
- Compatible safeties and stable installation.
- Price status
- Budget intent only; no live offer is published.
What “best power rack under $500” really wants
Shoppers using this phrase usually have a ceiling: cash, garage width, apartment tolerance, or all three. “Best” means best fit under constraint — not the heaviest competition rig. Educational comparison beats influencer unboxings that quietly assume a $1,500+ build.
Muslex keeps Soft YMYL boundaries: equipment education for generally healthy adults. A rack is not medical equipment and does not diagnose back pain. Learn progressive loading on progressive overload and home-friendly training patterns on dumbbells-only home muscle if a full rack is not realistic yet.
Must-have specs when the budget is capped
- Upright size and steel feel: thicker uprights and quality welds matter more than logo stickers.
- Hole spacing: Westside/1-inch style spacing helps fine bench and pin heights; 2-inch-only can feel coarse.
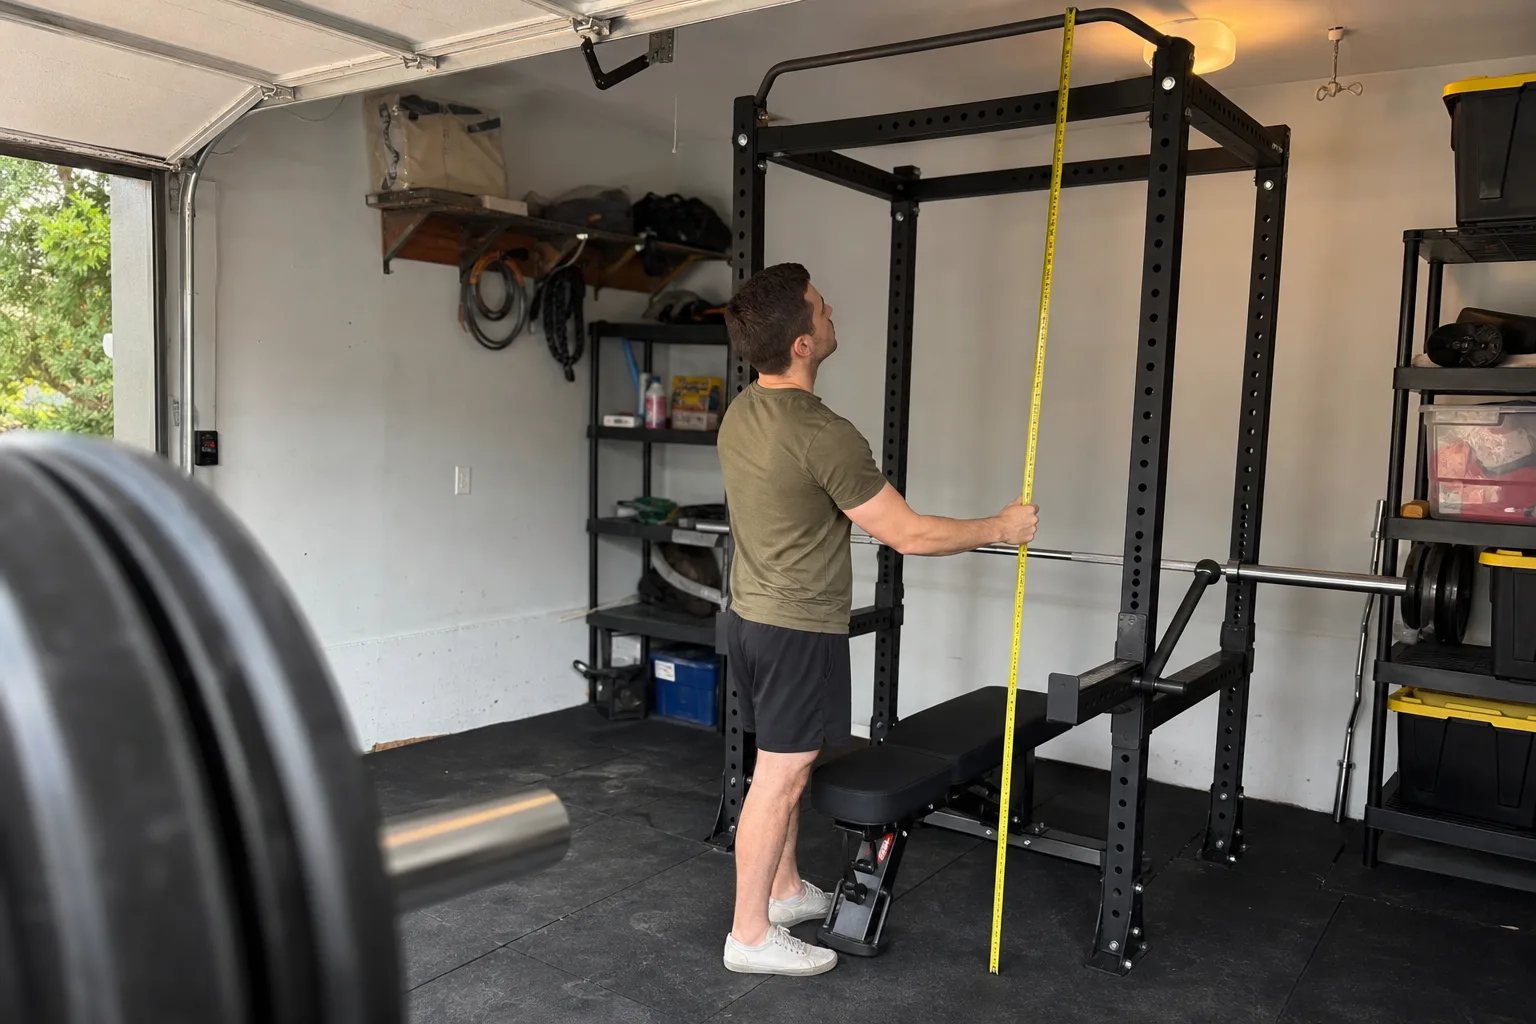
- Height: leave clearance for lockouts and your ceiling; measure twice.
- Depth/width: enough for a bench and your stance without scraping uprights.
- Safety arms or straps: non-negotiable for solo barbell work for most lifters.
- J-cups: secure, bar-friendly cups rated for your training loads.
- Pull-up bar: usable diameter and stable mounting if chin-ups are part of the plan.
If the “under $500” SKU only looks complete after you add mandatory safeties sold separately, recalculate the true entry cost before calling it a win.
Power rack vs squat stand vs “cage”
| Type | Typical upside | Typical trade-off under $500 |
|---|---|---|
| Full power rack / cage | Four uprights, better fail options | Heavier, larger footprint |
| Squat stand / half rack | Cheaper, more portable | Less enclosed safety structure |
| Folding wall rack | Space saving | Mounting quality and studs become the budget |
Language online is messy — some listings call a stand a rack. Read the photo for four uprights and safety arm compatibility, not the title alone.
Comparison parameter table (education)
| Parameter | What good looks like | Red flag |
|---|---|---|
| Published weight rating | Clear upright / J-cup / safety ratings | No numbers, only vibes |
| Safety options included | Arms or straps in-box or clearly budgeted | “Safeties sold separately” surprise |
| Hole spacing | Matches bench press pin needs | Huge gaps that strand the bar |
| Footprint | Fits measured garage/spare room | Buying before measuring doorways |
| Hardware kit | Complete bolts, clear manual | Missing braces, vague assembly |
| Warranty / support | Documented contact path | Untraceable marketplace ghost brand |
Space, ceiling, neighbors, and flooring
Measure ceiling height at the install point, not the room average. Account for plate diameter on overhead presses if you press inside the rack. Rubber flooring protects slabs and reduces noise complaint risk — pair mental models with quiet home training ideas from apartment-friendly guides later in the Muslex cluster.
If your real constraint is a small home gym, a compact rack plus adjustable dumbbells education often beats a giant cage you cannot walk around.
Spotting and solo lifting realities
Safety arms should be set to catch failed squats and benches without turning into a neck trap. Learn conservative depths and bail skills before chasing maxes. Pain during a lift is a stop signal — not a cue to add another plate because the rack “looks sturdy.”
Use warm-up structure from the warmup sets calculator and intensity literacy from what RPE 8 means so the rack becomes a training tool, not a dare machine.
Common buying mistakes under $500
- Choosing on Amazon star averages without reading upright and safety details.
- Ignoring shipping dimensional fees that break the mental budget (education note: always total landed cost offline).
- Skipping safeties to afford cosmetic accessories.
- Buying a rack too tall for the room or too narrow for your bench.
- Assuming any rack replaces coaching for technique-sensitive lifts.
What to pair with the rack (still education)
A rack without a barbell and plates is furniture. Prioritize a reliable bar, calibrated or honest plates, a stable bench, and chalk/collars before fancy cable add-ons. If budget is split, dumbbells can fill gaps — see buy adjustable dumbbells on Amazon education.
New vs used under the cap
Used commercial frames can outperform cheap new thin uprights — if you can verify straightness, hole wear, and complete safeties. Factor transport. If you cannot inspect, a simple new rack with clear ratings may be the lower-stress path.
Decision checklist
- Measure room height, depth, and door access.
- List must-do lifts (squat, bench, pull-up, pins).
- Require safeties inside the true budget.
- Compare hole spacing and ratings, not paint color.
- Plan bar + bench + flooring as part of the system.
- Ask Muslex for an educational shortlist discussion via inquiry if you want a second pair of eyes — still no cart.
Ceiling height math (do this before checkout)
Measure from floor to ceiling at the exact install spot. Subtract the height of your thickest floor mats. Subtract the radius of the plates you will use if you press overhead inside the rack. Then compare to the rack’s external height. A “great deal” that does not fit through the stairwell is not a deal. Also measure doorway diagonals for delivery boxes — budget racks often arrive in long cartons.
Which attachments are worth it under the cap
| Attachment | Value under $500 total system | Defer if broke |
|---|---|---|
| Safety arms / straps | Essential | Never |
| Extra J-cups | Nice for dual setups | Yes |
| Landmine | Useful variety | Often |
| Cable crossover add-on | Usually blows budget | Yes initially |
| Heavy bag mounts | Specialty | Yes |
30-minute inspection after delivery
- Inventory every bolt against the manual parts list.
- Check uprights for shipping bends before full assembly.
- Torque sequence as written — do not fully tighten early steps if the manual says otherwise.
- Set safeties and J-cups; load an empty bar and test wobble.
- Only then progress load gradually while listening for pops or shifts.
Programming once the rack is up
Own the basics: squat, hinge, horizontal press, vertical press, pull-ups or pulldowns if attached, and accessory work. Use upper/lower vs PPL vs full body to pick a split that matches days available. Plate math helpers live at plate load calculator.
Case study: garage under constraint
Alex has a $500 ceiling, 7'6" garage height, and trains alone. Alex chooses a shorter cage with 1-inch hole spacing and included safety arms over a taller “featured” rack that would scrape the door rail. Barbell and bumper budget sits outside the rack cap — planned honestly — so the system still works for squats and benches without fantasy cable towers.
Barbell and bench pairing rules
A best power rack under $500 decision fails if the bar is a noodle or the bench wobbles. Prefer a bar with sane spin and clear tensile claims for your training type, plates you can afford progressively, and a bench that fits inside the rack uprights with face-clearance for unracking. If the combined system exceeds your cash, shrink the rack fantasy and keep training with dumbbells until the budget is real — consistency beats Instagram cages.
Renters and landlords
Bolting to slabs may be restricted. Ask before drilling. Some racks allow ballast plates on base extensions; follow manufacturer guidance rather than improvised concrete blocks that shift. Protect floors with stall mats to avoid deposit drama. Noise from empty bar crashes is a social problem — use controlled eccentrics.
Printable shortlist questions
- What is upright size and hole spacing?
- Are safeties included inside my true total?
- Will it clear my ceiling with mats and plates?
- Can I move the carton into the room?
- What is the published weight rating for uprights and safeties?
- Who provides replacement J-cups in two years?
Solo lifting standards inside a budget rack
Set safeties for every heavy squat and bench. Avoid clown-lift ego attempts the first month you own a rack. Film a set monthly to spot depth and bar path issues. Pain that alters movement is a stop — equipment ownership is not toughness credentials.
FAQ
What is the best power rack under $500?
There is no single universal winner. Under a $500 hard cap, prioritize upright gauge, hole spacing, usable height, spotter arms or straps, and floor footprint for your space. This page teaches comparison criteria — Muslex does not sell racks or quote live retail prices.
Can a power rack under $500 be safe for barbell squats?
Many budget racks can support educational home use when weight ratings, assembly quality, and bolting guidance are respected. Always follow manufacturer load limits and local floor/ceiling constraints. Sharp pain or unstable equipment → stop and reassess.
Power rack vs squat stand under $500?
A full power rack usually offers four uprights and better spotting options. A squat stand may cost less and fold or move easier but typically offers less fail-safe structure. Match the tool to your lifts and who trains alone.
Do I need to bolt a budget power rack to the floor?
Many manufacturers recommend bolting for tipping resistance, especially with pull-up work or aggressive rack pulls. Read the manual for your model. Renters may need temporary ballast solutions — still not a substitute for rated hardware.
What extras matter most under $500?
Safety arms or straps, J-cups that fit your bar, pull-up bar diameter comfort, and hole spacing that matches your bench and bar height. Cable attachments are optional and often blow the budget.
Is a used power rack under $500 smarter?
Used can raise capacity for the same cash if welds, holes, and hardware are sound. Inspect for bent uprights, cracked welds, and missing safety pieces. When unsure, ask a knowledgeable friend or skip the deal.
Safety boundary
- Follow manufacturer assembly and load limits.
- Bolt or stabilize as instructed; tipping hazards are real.
- Solo heavy barbell work needs working safeties and conservative loads.
- Muslex does not sell racks or provide structural engineering sign-off for your home.
References
- Manufacturer manuals for any rack you consider — primary safety source.
- ACSM progression models in resistance training — programming context.
- Editorial note: “Best under $500” is constraint-fit education, not a sponsored ranking.